In this post we go through the steps required to get a Graph Node up and running using Docker and Hetzner hosting.
This is based on the instructions from Stake Squid and their GitHub repository https://github.com/StakeSquid/graphprotocol-testnet-docker. I suggest you start with that tutorial, however I will also cover off any issues I had while following those steps.
Hosting requirements
To get started I’ve chosen a Hetzner Cloud setup the CPX51 and added an addtional volume for storage (1024GB). For a production I’m likely going to be using one of the PX or SX dedicated servers as the additional volumes (you need 8TB for production) are much cheaper to run and the machine is a lot faster.
Select the LTS Ubuntu server as the OS.
Installing
Install Docker, git, and httpie.
apt update -y
apt install docker.io docker-compose httpie git
Next, run the following commands to get it setup
git clone [email protected]:StakeSquid/graphprotocol-testnet-docker.git
cd graphprotocol-testnet-docker
git submodule init
git submodule update
git config user.email "[email protected]"
git config user.name "Example User"
git branch --set-upstream-to=origin/master
The first time I ran the git clone I recieved the following error
[email protected]: Permission denied (publickey).
fatal: Could not read from remote repository.

Please make sure you have the correct access rights
and the repository exists.
This is related to GitHub not recognising the server making the request to using the git clone command.
To fix this you need to be on the server and run the following command (you can follow along with this tutorial as well)
$ ssh-keygen -t ed25519 -C "[email protected]"Start the ssh-agent in the background
eval "$(ssh-agent -s)"You should see something likek
> Agent pid 59566Add the SSH private key you just created to the ssh-agent
ssh-add ~/.ssh/id_ed25519The final step is to add the new SSH key to your GitHub account.
Get the Key you just created by executing the below
$ cat ~/.ssh/id_ed25519.pub
# Then select and copy the contents of the id_ed25519.pub file
# displayed in the terminal to your clipboard
^ Don’t forget to have the .pub at the end of the file or you’ll get your private key… that isn’t good.
Copy the key and add it to the New SSH Key that can befound under GitHub – Settings – SSH & GPG Keys.
Now rerun git clone [email protected]:StakeSquid/graphprotocol-testnet-docker.git and continue with the instructions above.
Once that is complete, time to install/update the Agora and Qlog modules
Install/update the Agora and Qlog modules
git submodule updateExecute the scripts.
./runagora --help
./runqlog --help
Configure a domain
You are going to be enabling SSL and connecting to endpoints to monitor your graph and you will need three endpoints.
These can be
index.yourdomain.com
query.yourdomain.com
dashboard.yourdomain.com
Create a mnemonic
Seems scary, but to do this you need to do what everyone tells you to never do under any circumstances which is to add your 12-15 word seedphrase for a wallet into a computer.
The steps in the instructions are pretty good, so I’ll just copypasta them below.
To make yourself a mnemonic eth wallet you can go to this website and just press generate. You get a seed phrase in the input field labeled BIP39 Mnemonic. Scroll down a bit and find the select field labeled Coin. Select ETH as network in the dropdown and you find your address, public key and private key in the first row of the table if you scroll down the page in the section with the heading “Derived Addresses”. You can import the wallet using the private key into Metamask.
Stake Squid
Run
Before you run you will need to configure the settings that you need.
[email protected] \
INDEX_HOST=index.sld.tld \
QUERY_HOST=query.sld.tld \
GRAFANA_HOST=dashboard.sld.tld \
ADMIN_USER=your_user \
ADMIN_PASSWORD=your_password \
DB_USER=your_db_user \
DB_PASS=your_db_password \
AGENT_DB_NAME=your_agent_db_name \
GRAPH_NODE_DB_NAME=your_graphnode_db_name \
MAINNET_RPC_0="http://ip:port" \
MAINNET_RPC_1="http://ip:port" \
RINKEBY_RPC="http://ip:port" \
OPERATOR_SEED_PHRASE="12 or 15 word phrase" \
STAKING_WALLET_ADDRESS=0xAdDreSs \
GEO_COORDINATES="69.420 69.420" \
docker-compose up -d --remove-orphans --build $@
One point to keep in mind is that you need to have GRT and ETH in the STAKING_WALLET_ADDRESS. You still need the 100k GRT for testnet, but they have a channel in their discord called #testnet-faucet where you can run a command !grt 0x.... where the 0x is your wallet address and they will add 100k GRT. Note that it isn’t the regular GRT, so you will need to add the other GRT if you want to see the tokens in there (not requried).
You also will need some Rinkeby ETH, https://faucet.rinkeby.io/. This requires you to make a post on Twitter or Facebook with your wallet address, and then paste that tweet URL into their site and they’ll send you x amount of ETH (depnding on how much you want).
Once you’ve completed that you can run the below command to verify that everything is running.
docker psYou should expect to see everything running except for the indexer-agent because you need to register for funding (the grt faucet task above) as well as approve and stake.
Let’s do that now.
Approving & Staking Testnet
This part isn’t clear based on the tutorial for the testnet that StakeSquid does but it’s about setting up the indexer, not about registering it.
There are other articles that go through this process which I’ve included below, but after going through almost all the steps StakeSquid let me know of Discord that all these next steps can be accomplished through the UI.
The steps will be
- Approve the Graph contract to interact with your wallet
- Stake your 100,000 GRT
- Set an operator on the ui via your indexer key (the wallet you created is the indexer, but you want to create a new wallet that is the operator because… well I’m not sure but they said you should so there we go).
- Configure the operator key on the agent
If you want to do it through the command line I’ve left some instructions below around where I had issues… but the UI is way easier.
Staking on the UI
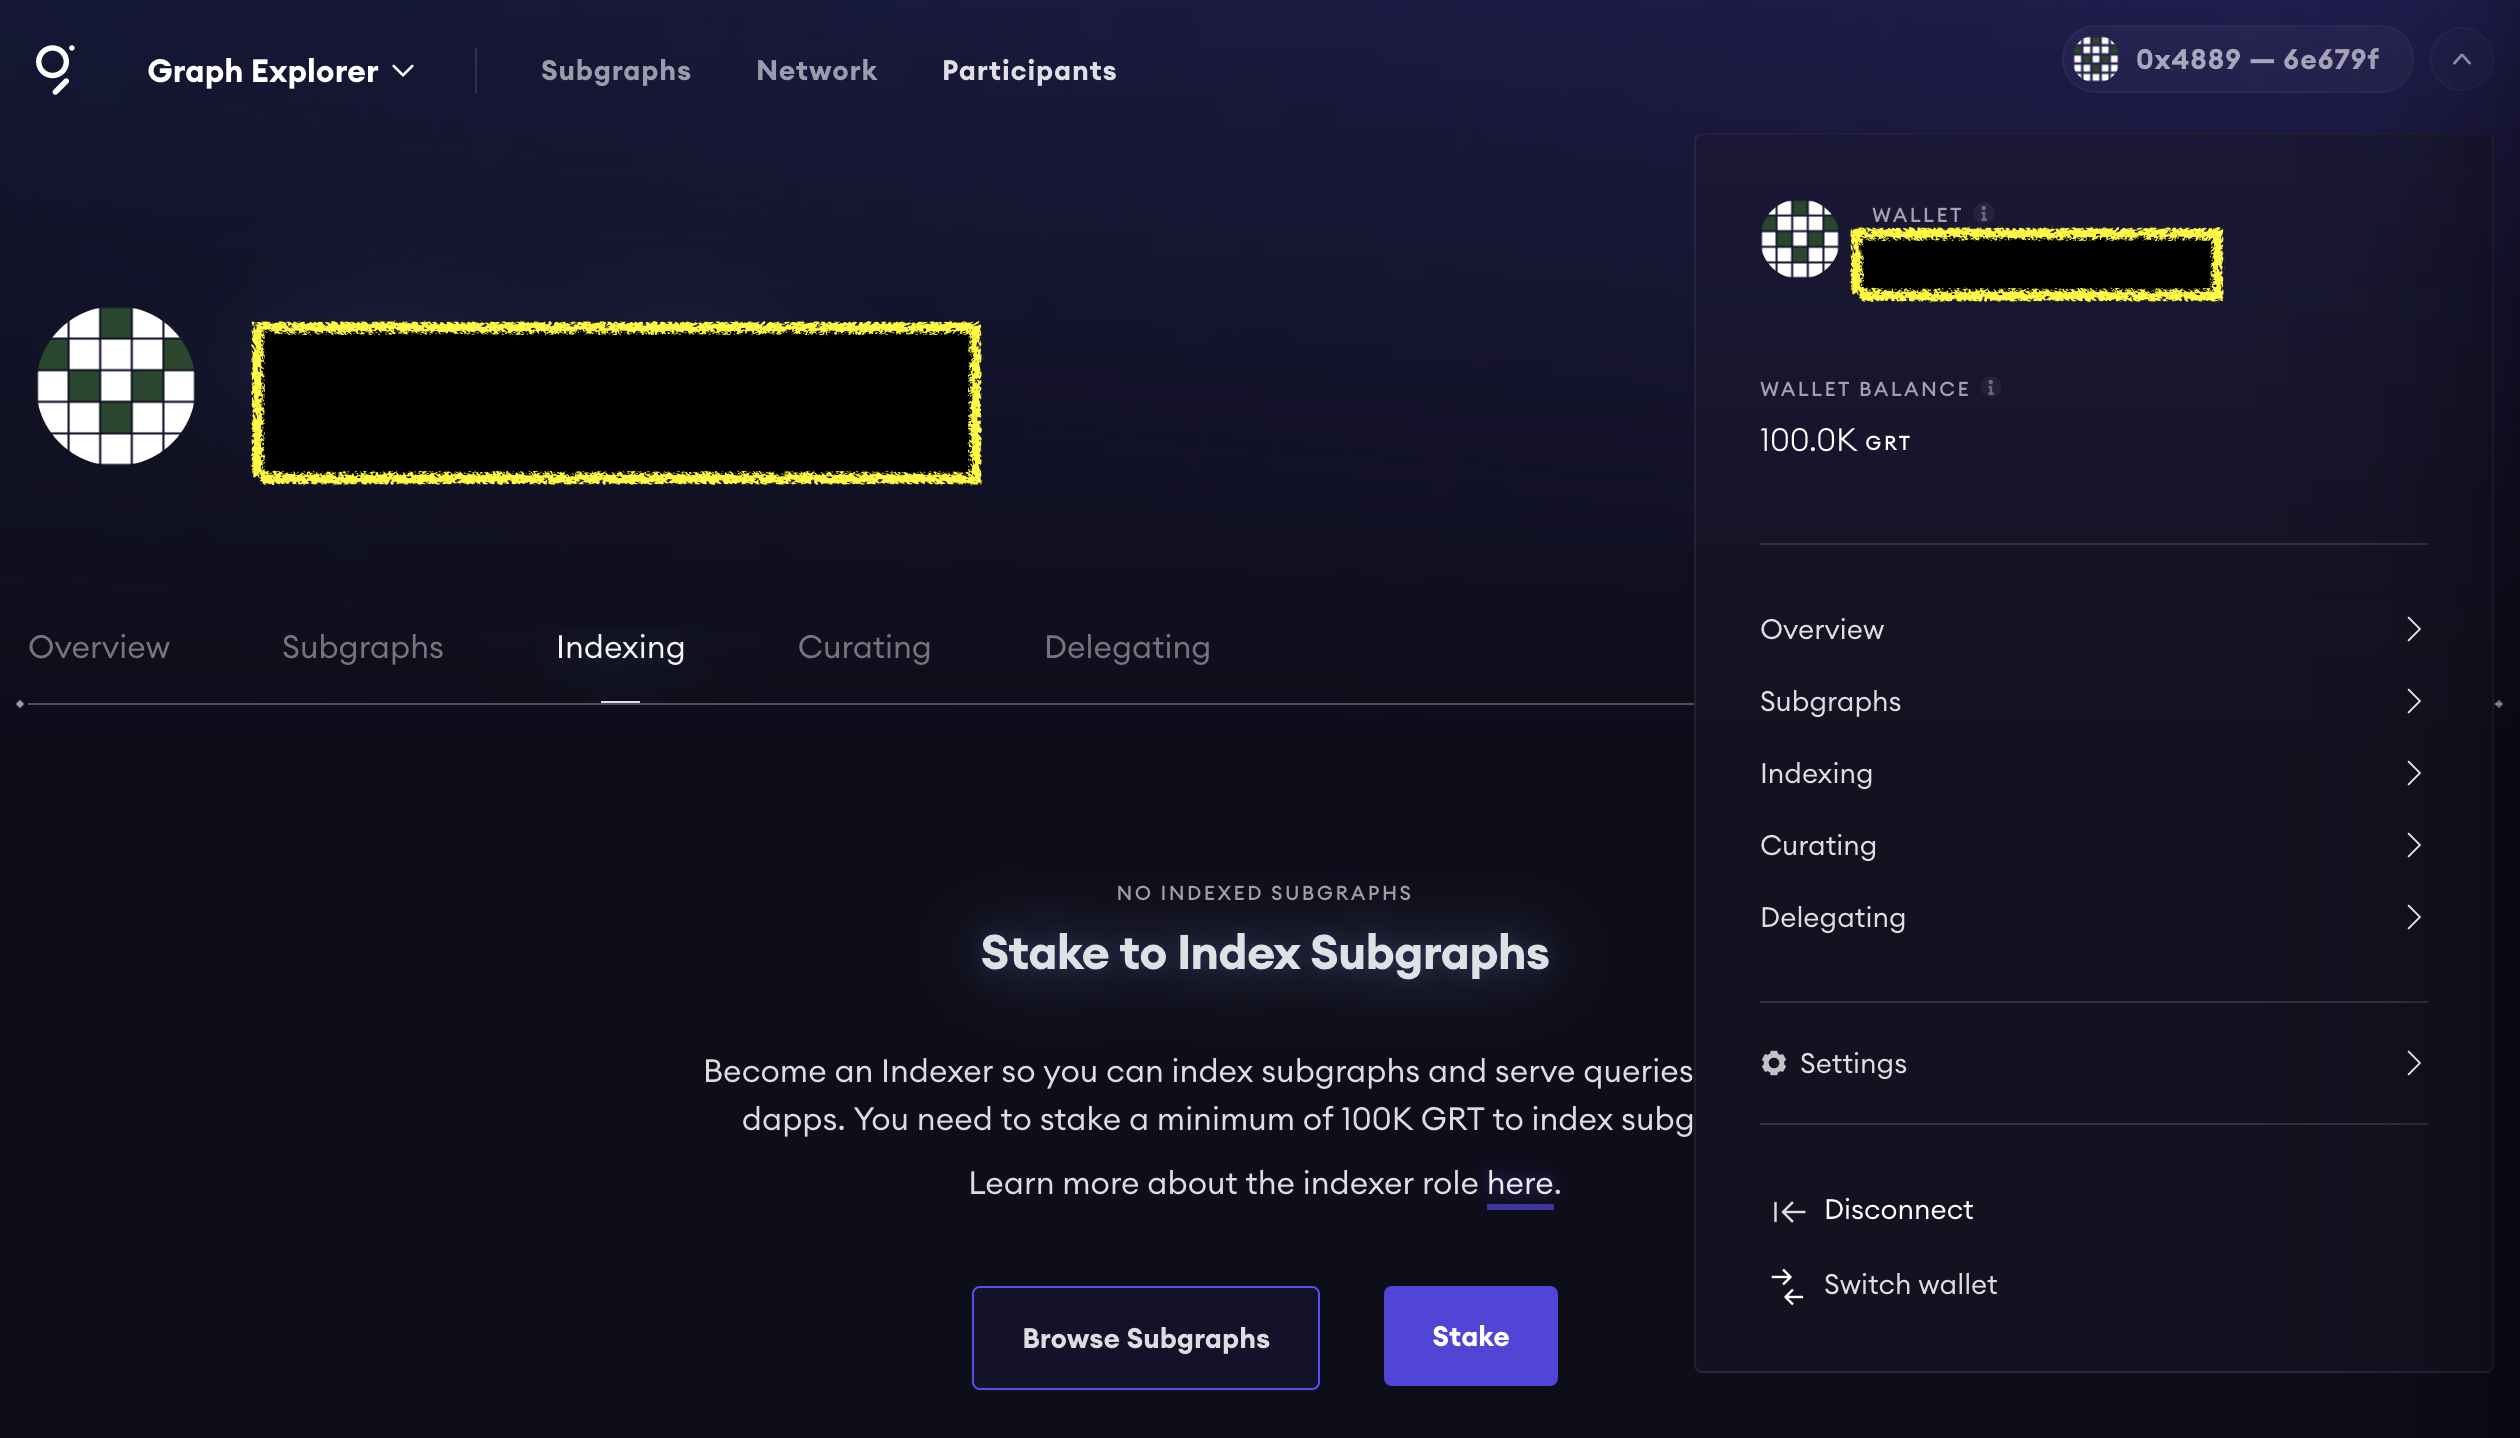
Go and visit the Testnet Graph UI.
Connect your wallet and change the chain to Rinkeby.
Go to the Indexing tab (or top right drop down and select Indexing), and then choose “Stake”. This requires an approval step, and then confirm your staking. Stake the full amount 100k.
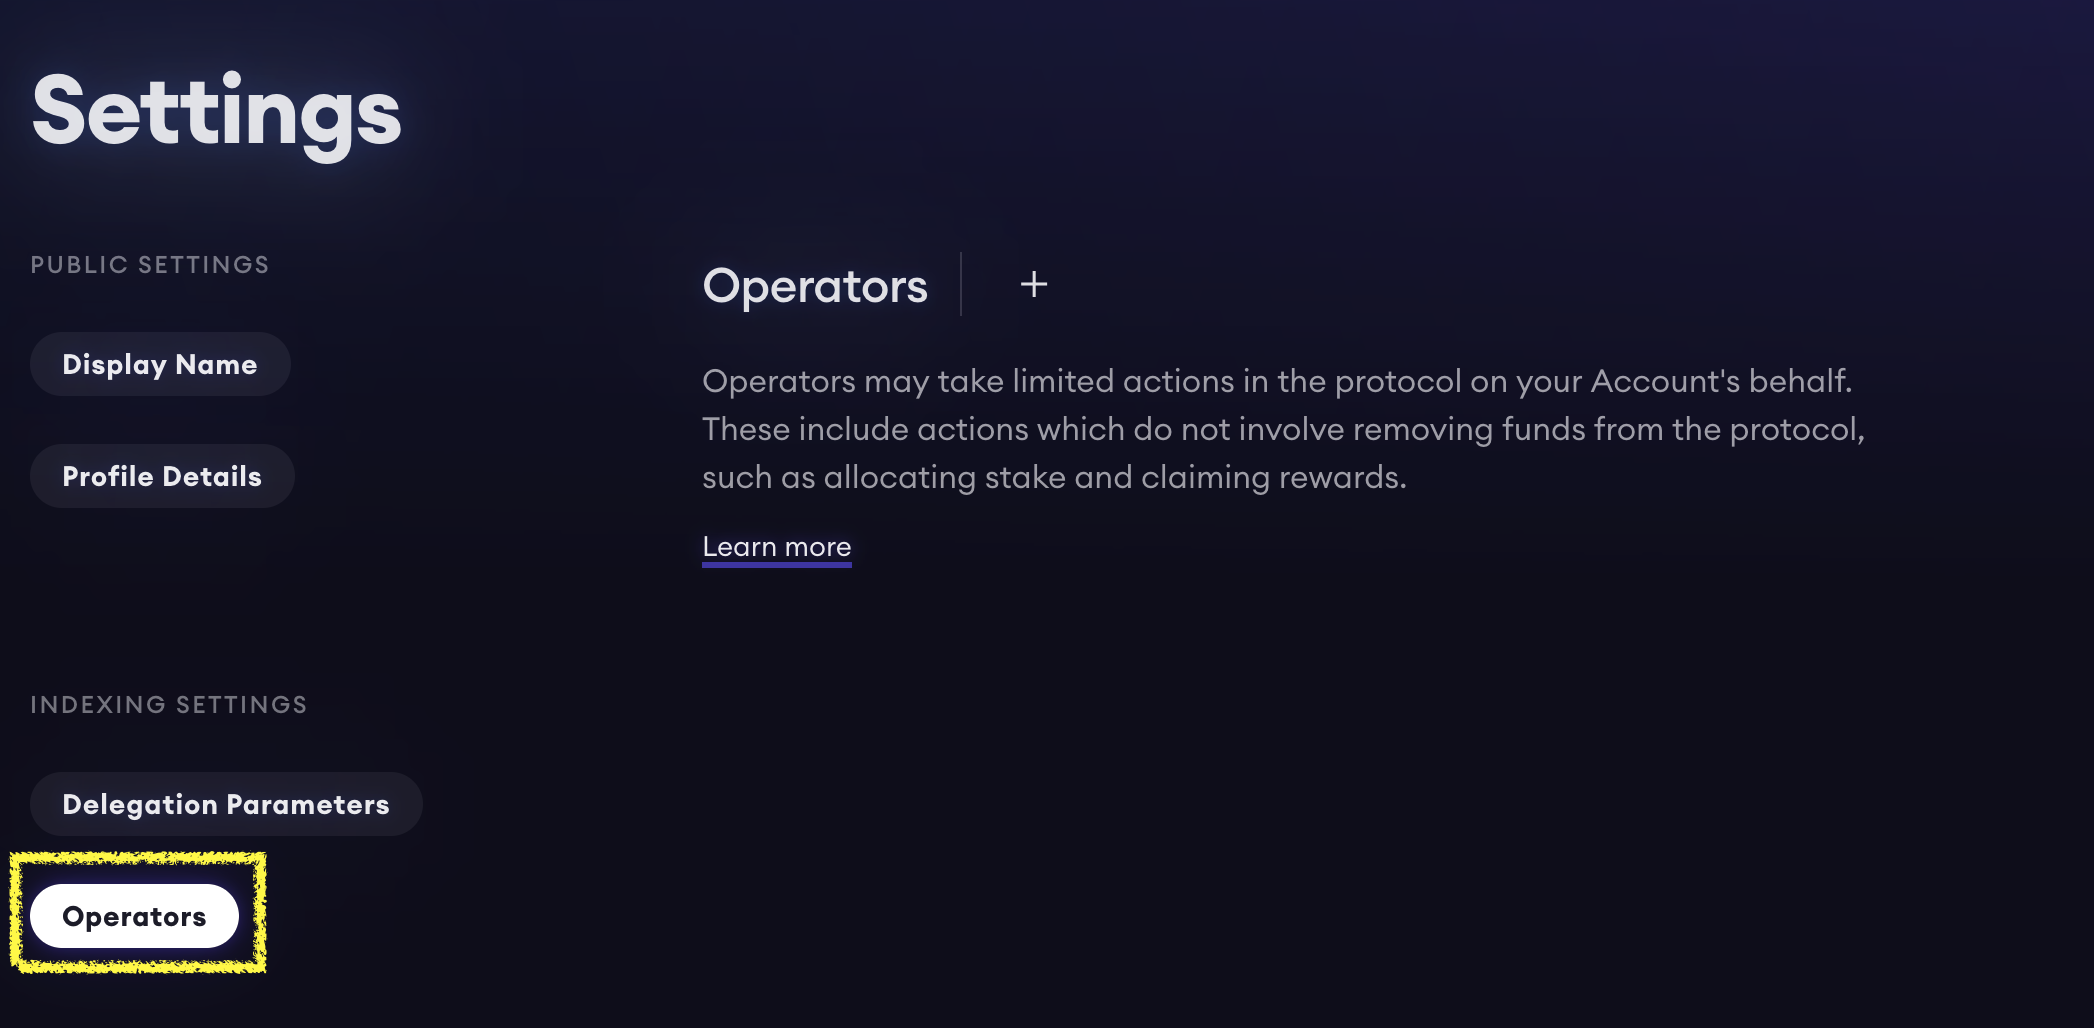
Set Operator
Go to your settings page, and under Index Settings choose Operators
With these updates I was running docker ps to see how the docker containers were going. All of them were working except for the indexer-agent.
CONTAINER ID   IMAGE                                           COMMAND                  CREATED        STATUS                          PORTS                                                                      NAMES
369d393ecd0f   ghcr.io/graphprotocol/indexer-agent:v0.18.1     "node dist/index.js …"   17 hours ago   Restarting (1) 44 seconds ago                                                                              indexer-agent
When I checked to see which rules were being applied using
./shell cli
graph indexer rules get all
I was recieving the following error
[Network] request to http://indexer-agent:8000/ failed, reason: getaddrinfo EAI_AGAIN indexer-agentAfter checking on the Discord the project owner recommended testing upgrading to indexer-agent:v0.17 or indexer-agent-v0.18.2.
To do this you need to run
nano docker-compose.ymland then update the following line to which ever indexer agent version you want to run (below I’ve updated this from v0.18.1 to v0.18.2
image: ghcr.io/graphprotocol/indexer-agent:v0.18.2Afterwards you need to rebuild the indexer-agent containter by running
bash start --force-recreate indexer-agentWith that run, I’m now seeing everything running perfectly on docker ps and the right response when running the .shell/cli + graph indexer rules get all
Staking Testnet CLI
To approve your testnet GRT to be spent through the staking contract, first approve it in the GRT contract:
git clone https://github.com/graphprotocol/contracts
cd contracts

 # If you haven't done this before:
npm install
npm run compile

./cli/cli.ts -m <indexer-mnemonic> -p <ethereum-rinkeby-node> \
  contracts graphToken approve --account 0x2d44C0e097F6cD0f514edAC633d82E01280B4A5c --amount <grt>
When running npm run compile we were getting errors that yarn wasn’t found, so I ran
npm install yarnto install yarn, and then ran npm run compile again.
The second time around I get the error
/usr/bin/env: ‘ts-node’: No such file or directoryTo combat that you need to also install the following
npm install -g typescript
npm install -g ts-node
Now you can run
./cli/cli.ts -m <indexer-mnemonic> -p <ethereum-rinkeby-node> \
  contracts graphToken approve --account 0x2d44C0e097F6cD0f514edAC633d82E01280B4A5c --amount <grt>
Just a note on those details
Indexer-nnemonicis the seed phrase for your accountethereum-rinkeby-nodeis the alchemy Rinkeby endpoint you would have setup earlier<grt>is the amount of GRT, which for this was the100000we received earlier.
Afterwards, stake this amount:
./cli/cli.ts -m <indexer-mnemonic> -p <ethereum-rinkeby-node> \
  contracts staking stake --amount <grt>